
I recently got a Lumix GX8 mirrorless camera, which I have been really impressed with. I’ll write about various other aspects of it in due course, but today I did my first serious test of its 4K photo mode, which is a new feature on several recent Lumix cameras. And I’ll explain how I used this to create cool composite images like the one above.
4K photo mode takes a 4K video (roughly 4K x 2K pixels), but using settings that are suitable for extracting good quality photos from the video, rather than settings that are suitable for smooth video, which would typically be a 1/60s shutter speed for a 30 frame per second video. You can set whatever setting you like for each frame, for example setting a fast shutter speed to freeze action, which is what I did in this case.
This enables you to take 8 megapixel JPEG images (not RAW, unfortunately) at a rate of 30 frames per second, which is a great option for fast moving action.
I went to a raptor photo workshop today organized by Rob Palmer. I’ve been to several of these before and highly recommend them. Apart from using 4K photo mode to get individual photos, I thought beforehand that it would be interesting to capture images that would be suitable for combining into composite images, like I did with my lightning photo a few months back.
The workshop gave you lots of opportunities to picture flying birds – in general they would fly from a perch to one of their owners/ handlers, like this:
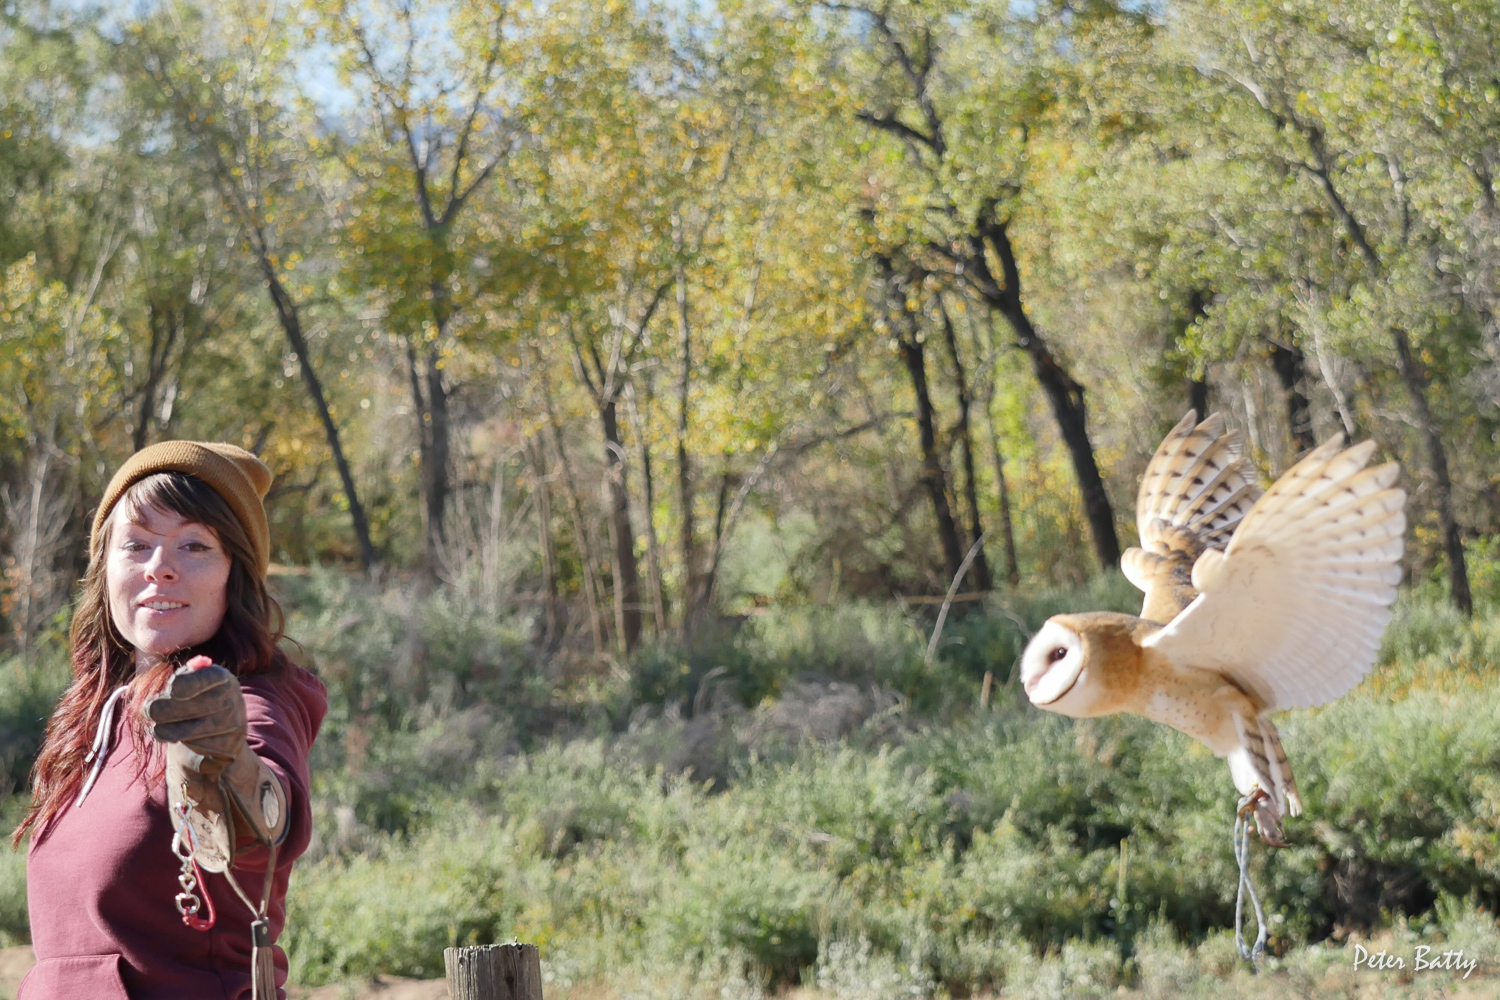
So what I did was to set my camera up on a tripod and focus on the woman who the bird was flying to, then I switched to manual focus to keep the focus at that same distance, and I rotated the camera slightly to the right so I just had the trees in the background. I used shutter priority mode, as I didn’t have a bright background so I figured I didn’t need to use manual mode. I set a high shutter speed, 1/2000s, to freeze the action, and ISO 400, which gave me an aperture setting of F/2.8. I was using my Olympus Pro 40-150mm lens (80-300mm equivalent), at 40mm to get a wide enough field of view to fit several owl images into one frame. Then I captured an eleven second 4K photo video, which looked like this:
Barn owl 4K photo video from Peter Batty on Vimeo.
You can extract images from the video in the camera, but I prefer to do it in Lightroom. You can play movies in Library mode only, not Develop mode, and the screen looks like this.

The control at the bottom of the video looks like this by default …

… and you can click on the gear icon at the right to expand it to look like this …

You can play the video in the obvious way, though your computer may struggle to play 4K video smoothly. I can play it reasonably well on my iMac, but not on my MacBook Air. If you want to capture a frame from the video, you just pause at the right point and click the screen icon to the bottom right, and choose “Capture frame” – this will create a new jpeg image right after the video in your current Lightroom folder. The arrow icons either side of the play icon let you move forward or backwards one frame at a time, which is very useful for this type of work.
I created a JPEG image for (almost) all the frames that featured the owl flying through. I then selected all of them and exported them from Lightroom to Photoshop, using “Photo -> Edit in … -> Open as Layers in Photoshop”. I’m no Photoshop expert, I use Lightroom for nearly everything, but with a bit of trial and error I did the following (any advice on better approaches welcome!).
I put a layer mask around the owl on each layer. I did this by clicking on the Quick Selection Tool icon on the left hand side, and dragging this over the owl to select its outline. You can remove areas from the selection by holding option and dragging. Once I had the selection outline as I wanted it, I chose Layer -> Layer Mask -> Reveal Selection, which gave me a layer that looks something like the following:
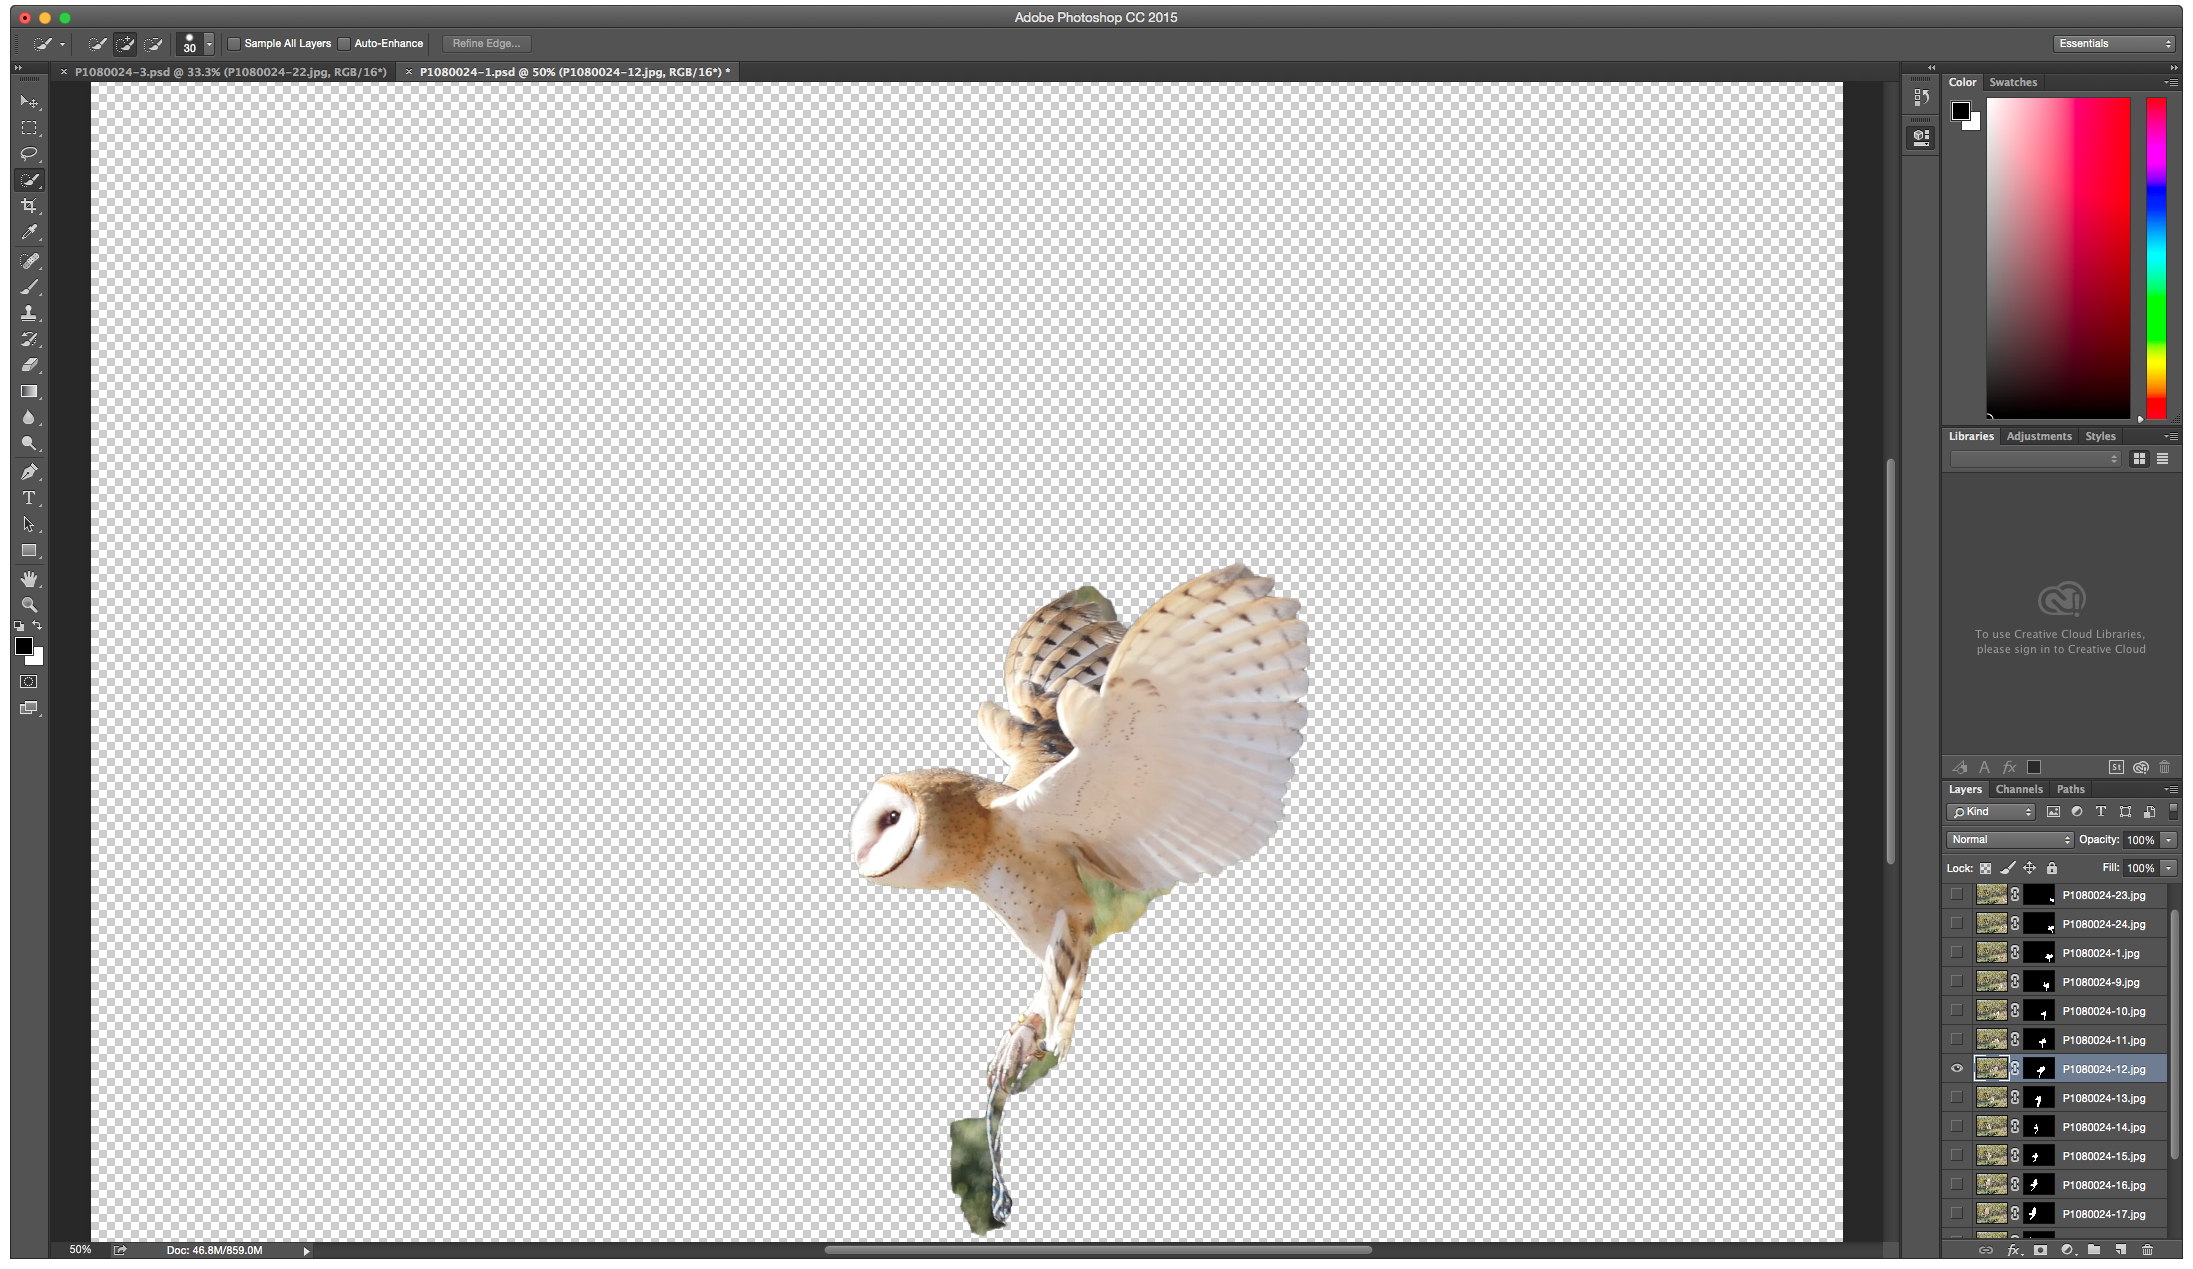
I left the layer with the owl closest to the left hand side as a complete image, including the background, and ordered the other images so that an owl to the right would appear above an owl to its left. With all 17 layers turned on, this gave me this image:

I tried a couple more variants, just by turning some of the layers off. This one used 6 images, with some of the owls still having a little overlap:

And this one just uses 4 images, with no owl overlap:

I’d be interested to hear which image you prefer! I will probably take a little more time and remove the rope from the owl’s legs, which should be easy enough to do, either by removing it from the masks in Photoshop, or by cloning in Lightroom, or a combination of the two.
Here’s a final composite image, for now, using the same technique, but from a different photo sequence:

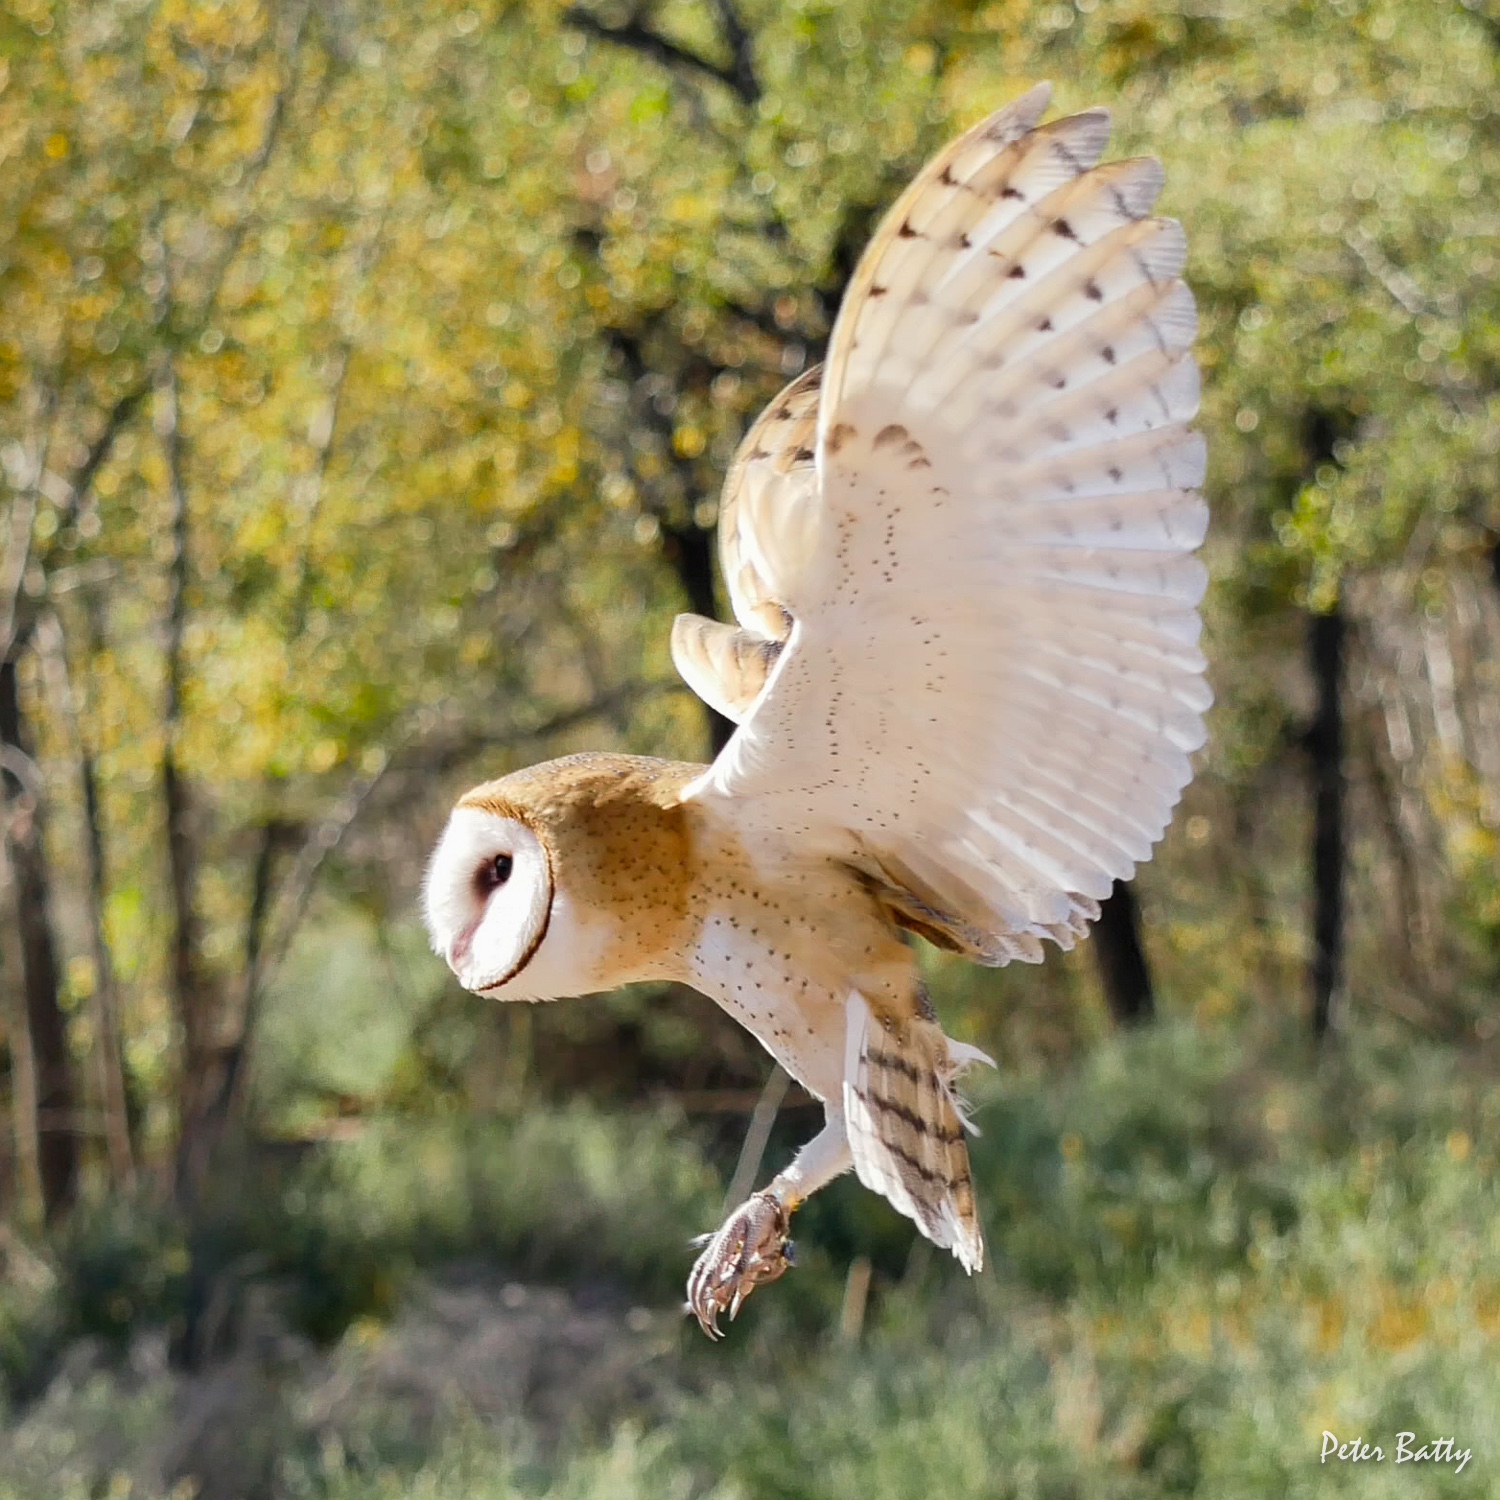
Overall I was impressed with the quality of the images I got using 4K photo mode. While I like to shoot RAW images normally, to have more flexibility in image editing, I will definitely use the 4K mode as an option in situations where I want to capture very fast moving action. Here is a single image from the sequence, cropped and with a little tweaking of exposure and color, and some quick cloning to remove the rope.

Very nice Pete. I probably prefer the 6-image composite, because you can see more of the bird; but the 17-image version results in an interesting effect with repetitions of the owl’s face.