
Today’s featured photo is a picture of Rio at night, taken from Sugarloaf Mountain, Pão de Açúcar, which provides iconic views over the city.
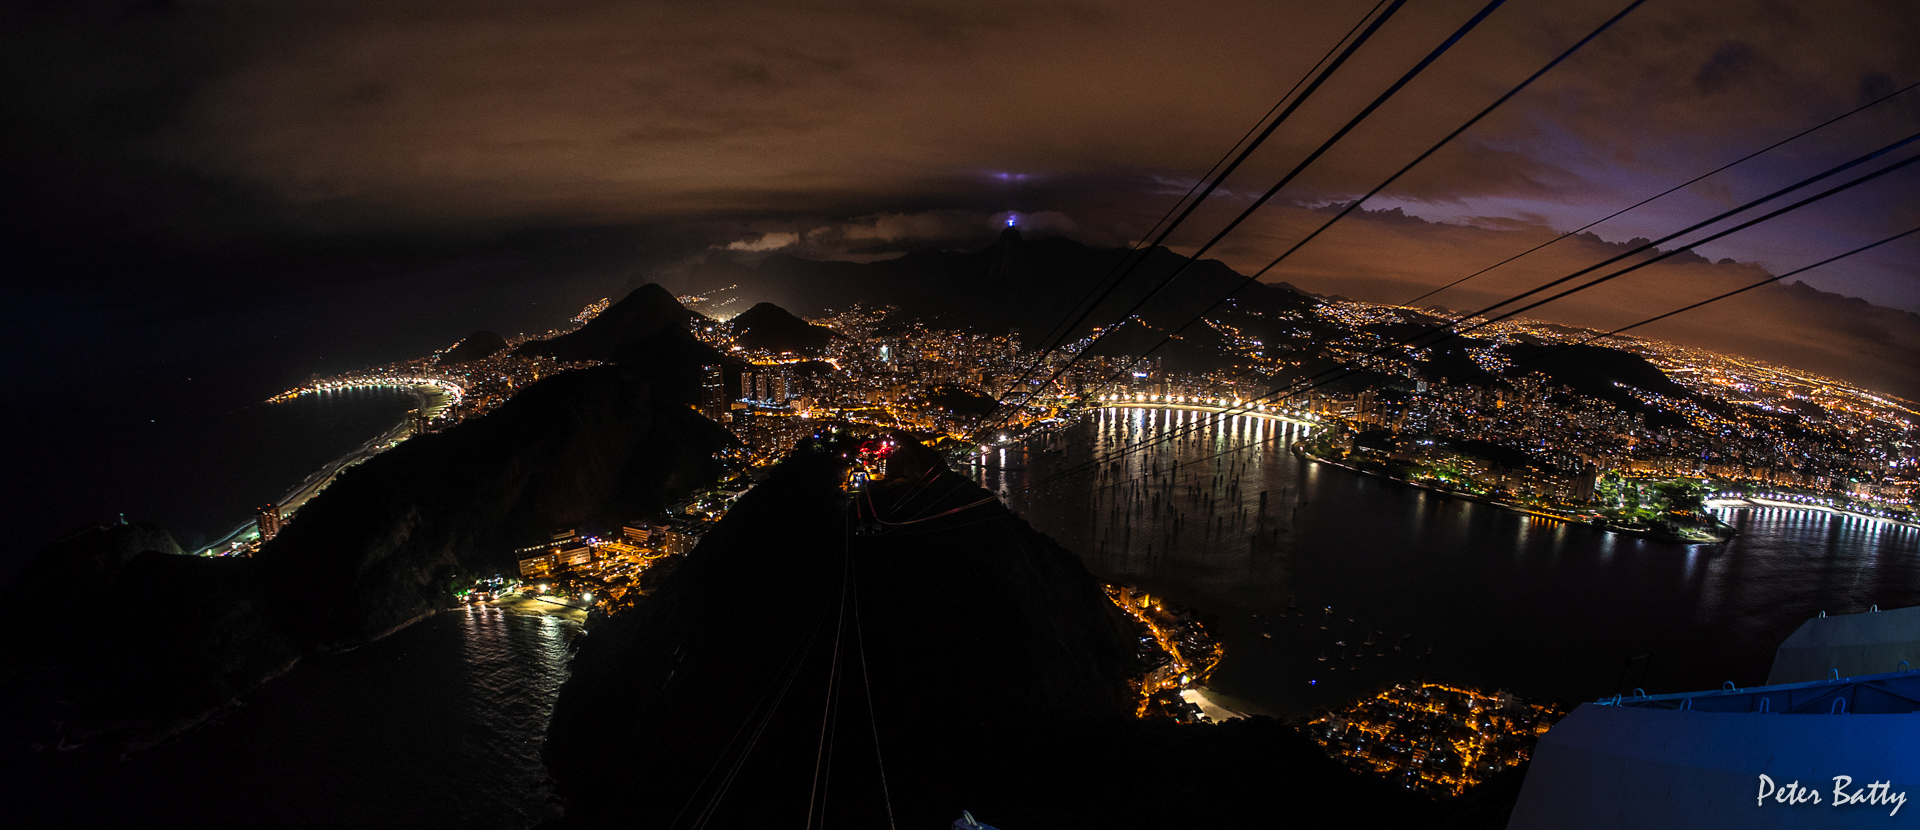
It is known for great sunset views, but unfortunately the evening we went up there was no real sunset, and a lot of cloud cover which hid the tops of the mountains and the statue of Christ, Cristo Redentor. We decided to wait up there until it became dark, and were rewarded by the clouds clearing enough to get a great view – just another example of the fact that patience and timing are essential to getting good landscape and cityscape shots.
One practical tip if you are going to Sugarloaf is that the lines for the cable car (bondinho) can be quite long, but you can book tickets online (for a specified time) which should speed things up – we didn’t do this. Either way, if you are going there for sunset, allow some extra time for standing in lines, both at the bottom and half way up, where you stop at the lower mountain, Morro da Urca, and have to catch a second cable car.
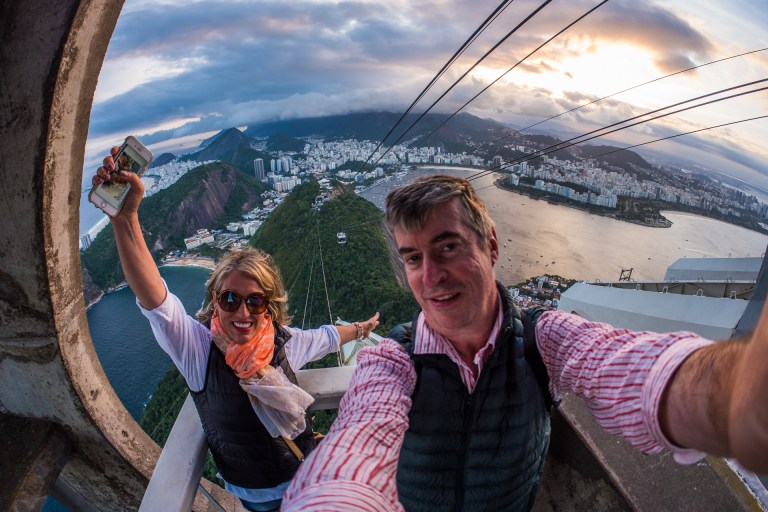
When we were there, about a month before the start of the Olympics, there were actually very few places at the top of Sugarloaf with a view towards the city like this – it seemed as though they were doing lots of remodeling up there, presumably because of the Olympics. In fact the only place I found to get this view was right by the top of the cable car, a spot where at most two people can fit at once. Paula and I are standing there in this selfie, which obviously we took a bit earlier, before dark – and you can see the clouds covering Cristo here.
Later on there was quite a line of people waiting to take photos here, so I had to be patient and wait a while, and then be fairly quick taking the picture when I got to the front and had my turn. I needed to use a tripod of course for a night shot like this – I used a 1 second exposure and ISO 400. There was no room to stand the tripod normally, so I used it with the legs as short as possible – it’s a pretty compact tripod, and had to perch it rather precariously on the corner of the railings that you can see here, holding onto it while I shot, which was not ideal.
I took this shot with my newest lens, which is a wide angle fisheye lens by Rokinon. It has a focal length of 7.5mm, which on my micro four thirds LUMIX GX8 camera translates to a 15mm equivalent on a full frame camera. I’ve been really pleased with a number of the pictures I’ve got with it – it’s great for these sort of wide cityscapes.

Its maximum aperture of f/3.5mm is not super fast, but that’s not too important for landscape and cityscape photography which is where I mainly use this. An interesting thing about this lens is that it is fully manual. You have to focus manually, and change the aperture manually by turning the aperture ring on the lens – the camera can’t set the aperture on the lens. The camera can’t even read the aperture to record what was used in the EXIF information stored on the photo – you just see the shutter speed and ISO, but no aperture value. But on the positive side, its optics are excellent and it is much cheaper than similar lenses that aren’t manual. Panasonic has a 7-14mm zoom lens that costs around $800, for example, while I paid around $250 for this. The manual focus is not nearly such an issue as you might think, as the depth of field is so large on a lens with such a wide angle that you can just set the focus to infinity and not worry about it. At the widest aperture of f/3.5, everything should be sharp from 3.5 feet away to infinity, and stopping down slightly to f/5.6, everything is sharp from 2.5 feet away.
You do get some distortion with a fish eye lens, which can be an issue in some situations but not in others. You can correct the distortion to varying extents with post processing, but generally at a cost of losing some of the outer edge of the image. And the distortion bothers some people more than others – in a lot of situations I’ve liked the images I got just fine, without doing any correction. Over time I’ll post more fisheye images I’ve taken so you can see for yourself what you think – click here for more.
A good technique with the fisheye in a lot of cases is to centre the horizon in the image when you take it, then the horizon will be straight, whereas it will be curved if it is above or below the center. I didn’t manage to do that in this case, probably because of the situation of being rushed and also having to balance the tripod precariously so it was hard to set up as carefully as usual. So here the horizon curves down at the edges but I still think it looks good – I don’t particularly have an urge to correct it, though I suppose I could!
Actually I just decided to do a quick lens correction in Lightroom, which is the simplest (but not the only) way to reduce the distortion. After that, the image looks like this (this version is also missing a few final tweaks I did to the one above in Photoshop):

You can see that the horizon is flatter, especially on the right side of the image, but also items near the edge are stretched. So the lights on the shore at the right hand side of the image are much wider and more spaced out than the ones in the middle, and we’ve lost about half of the lights that we originally had there. I like the look of those lights much better in the top image – the three groups of shore lights across the image match better, and I think the image has a better balance. I could use warp tools or other techniques, but overall I like how the original image looks, so I’m happy to leave this one uncorrected.
I didn’t do much other work on this image, just a bit of minor tweaking of tone and colors in Lightroom and a little sharpening with a high pass filter in Photoshop, which also intensifies the lights a little. I’ll talk more about the sort of post-processing I do in other posts, I think that is enough for now!
